Chief Editor Rhiannon D’Averc shares some behind the scenes tips on how she edits location editorial photoshoots – including the cover editorial shot for Issue 28.
Organising location photoshoots can be tough. With changeable weather conditions, and the unpredictability of what might happen on the day, there’s a lot to take care of.
This is all the more true when shooting ahead of schedule – for example, shooting an autumnal issue in the summer, or a winter wonderland theme in September. When there’s no other way to get it done, you have to find tricks to get around the problems of scheduling and still make the concept work.
Today I’m sharing one of the tools I have in my arsenal: the use of actions and brushes to change a photoshoot’s time of year, making it look like it was shot at a totally different time.
Let’s start with the easiest way to change the mood of a shoot, no matter where it took place.
CHANGING COLOUR TONES
This is a super simple way to create mood and atmosphere, and many photographers aren’t using it correctly. Many don’t realise it can be done, and those that do can often overdo it. I was definitely guilty of that when I first discovered how colour toning can make an image feel really different.
Colourising an image in Photoshop is just like using a filter on Instagram. You can do it manually, but I find it’s always easier to have a pre-set action which you can use time and time again, knowing what the results
will be. I get the majority of my colourising filters from Summerana, a company that creates actions, presets, brushes, and overlays for Photoshop and Lightroom.
They have two collections which I’ll be focusing on the most during this article: ColorFall and WinterizeMe. I’ve been using both of these for a few years now and they really stand the test of time, becoming useful over and over again.
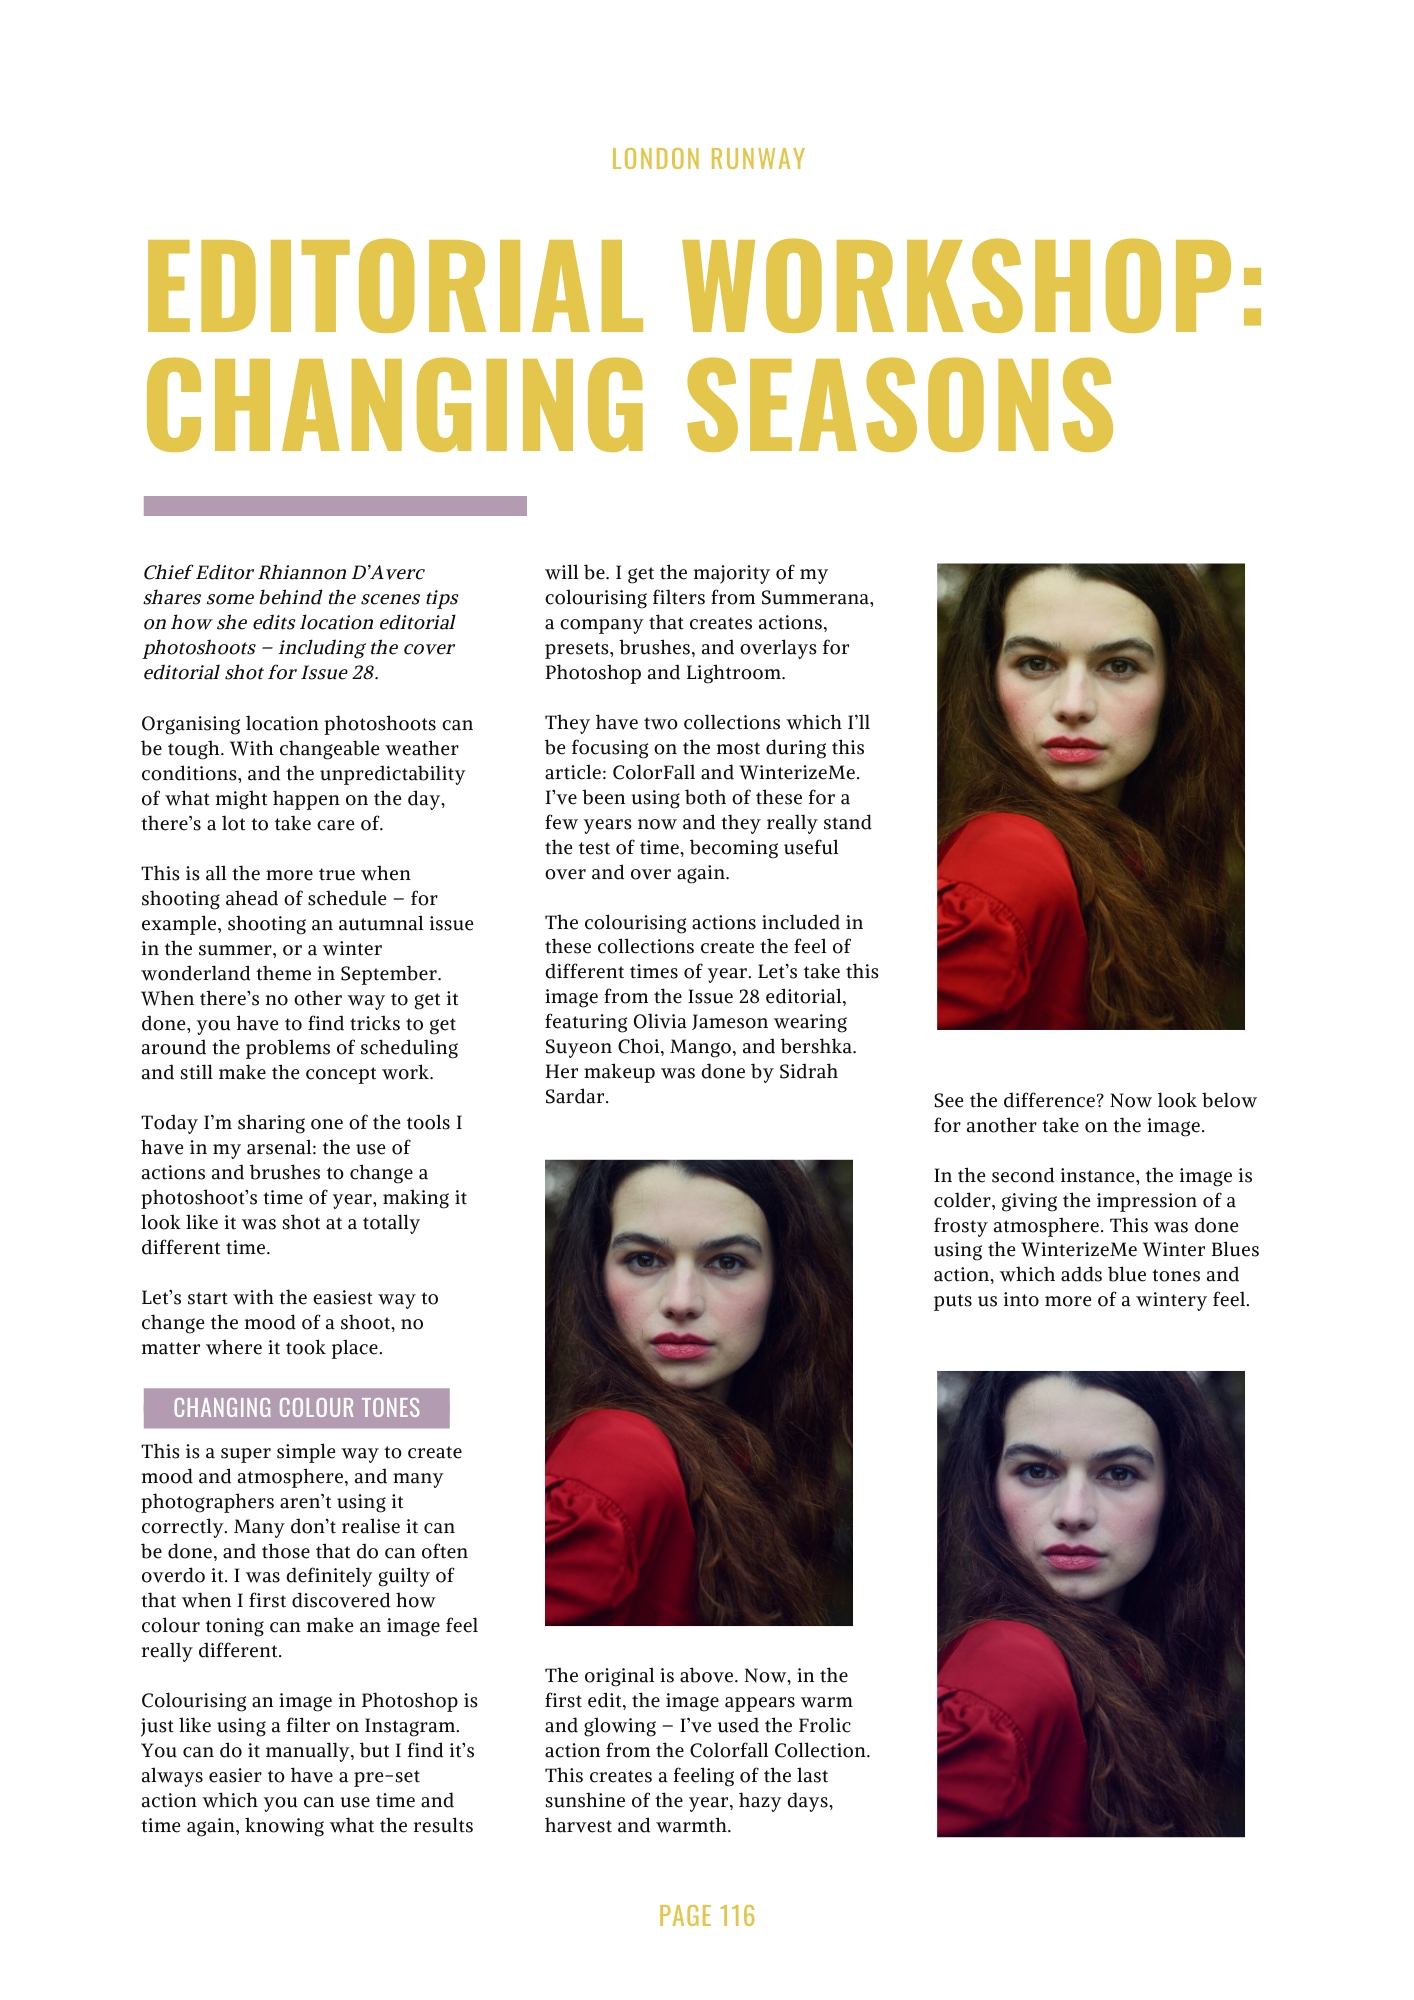
The colourising actions included in these collections create the feel of different times of the year. Let’s take this image from the Issue 28 editorial, featuring Olivia Jameson wearing Suyeon Choi, Mango, and Bershka. Her makeup was done by Sidrah Sardar.
The original is above. Now, in the first edit, the image appears warm and glowing – I’ve used the Frolic action from the Colorfall Collection. This creates a feeling of the last sunshine of the year, hazy days, harvest and warmth.
See the difference? Now look below for another take on the image.
In the second instance, the image is colder, giving the impression of a frosty atmosphere. This was done using the WinterizeMe Winter Blues action, which adds blue tones and puts us into more of a wintery feel.
EDITING FOLIAGE
This is a pretty tricky area: even if you change the colour tones, and make the image feel a little more frosty, you’d have to lay it on pretty thick to make summer foliage look like a different time of year. The good news is, the same collections have some brush-on actions which can create an interesting effect.
The idea of brushing on an action is to target a really specific area of the image. In this case, we just want to brush on the action over the leaves of the trees in the background, to cool them down and make them look more autumnal.
Here’s an image that we used in the editorial itself, as it was shown. On this image, I had already used the WinterizeMe collection to tone down the leaves and make it look cooler.
In this next image, however, the leaves still appear lush and green in the background. We shot at a really changeable time of year, when orange leaves had already fallen but green leaves remained on the trees.
That’s why it was super important to work on the edits so we could hide the fact that everything still looked so lush – and you can see the difference now when we use the brush-on September Equinox action to make it work.
Now here’s that same image again, using this time the Winterize My Grass action from the WinterizeMe collection. I’ve even taken it a bit further by applying the WinterizeMe Snow Applicator and brush from the same set, which applies a snowy effect – and which is also controlled by the brush for a more precise result.
It’s amazing to see the results. Using just a few quick clicks, an image can transform from early Autumn with lush green leaves, to a strong Autumn feel with orange and red foliage, through to a fully winter feel even including snow.
OTHER EDITS
The images were, of course, not published without other edits. I also made the following changes before adding the Summerana actions:
This is one of my favourite sets to play around with, and in particular the portrait used in the first exercise here is one that I like to re-edit from time to time. I’ve shared several different versions on Instagram (@pcistudio) – for example, with more intensive skin edits that remove the marks under the eyes, with more glowing or warm colour toning, and so on.
There’s a lot of room to play when you have presets and actions which are easy to use. It’s possible to change a whole image with a few clicks, then change it back again, since all you need to do is delete the layer that the action created and everything is back to how it was. Actions are also super easy to install in Photoshop – you just click the menu button for the actions panel, and import or load a new action from your downloaded files. It then takes a matter of a split second to be loaded in, and you can use it straight from the actions panel without having to redownload it in the future.
With such ease of use and such immediate, intense results, it’s clear why I love using actions and brushes like these to get the job done!
Original editorial images appeared in Issue 28 of London Runway, available to view at issue.com/londonrunway.
Summerana collections are all available from Summerana.com. View more of Rhiannon’s work at twitter.com/rhiannondaverc


